

How to Make a Spring by Hand or with a Coiler
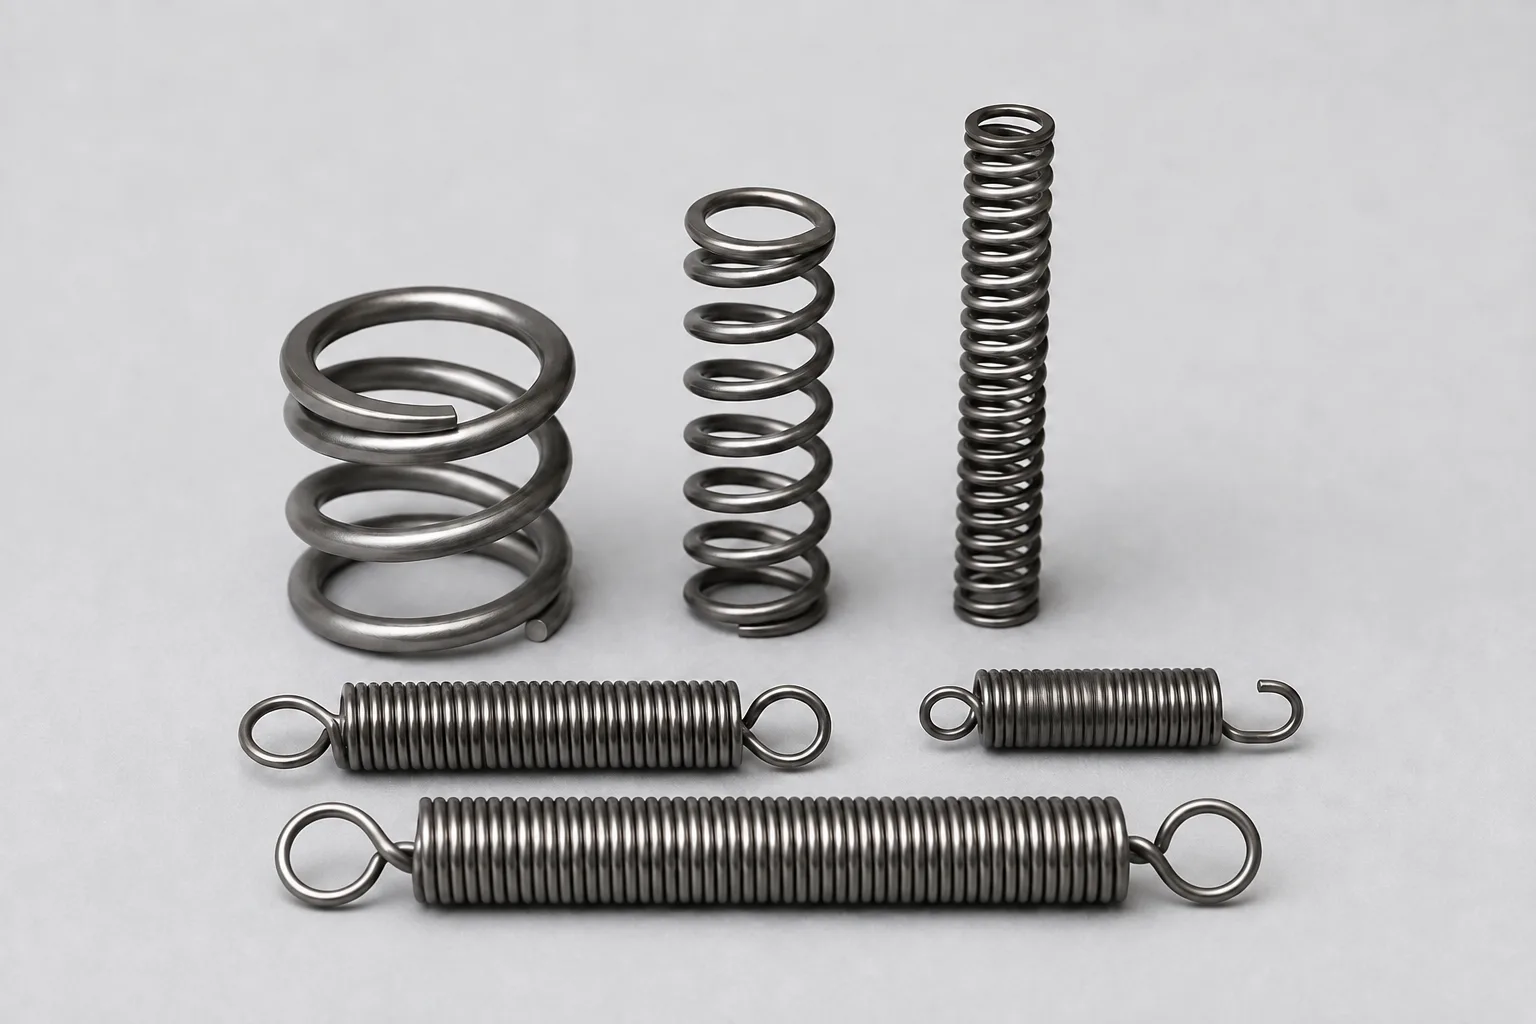
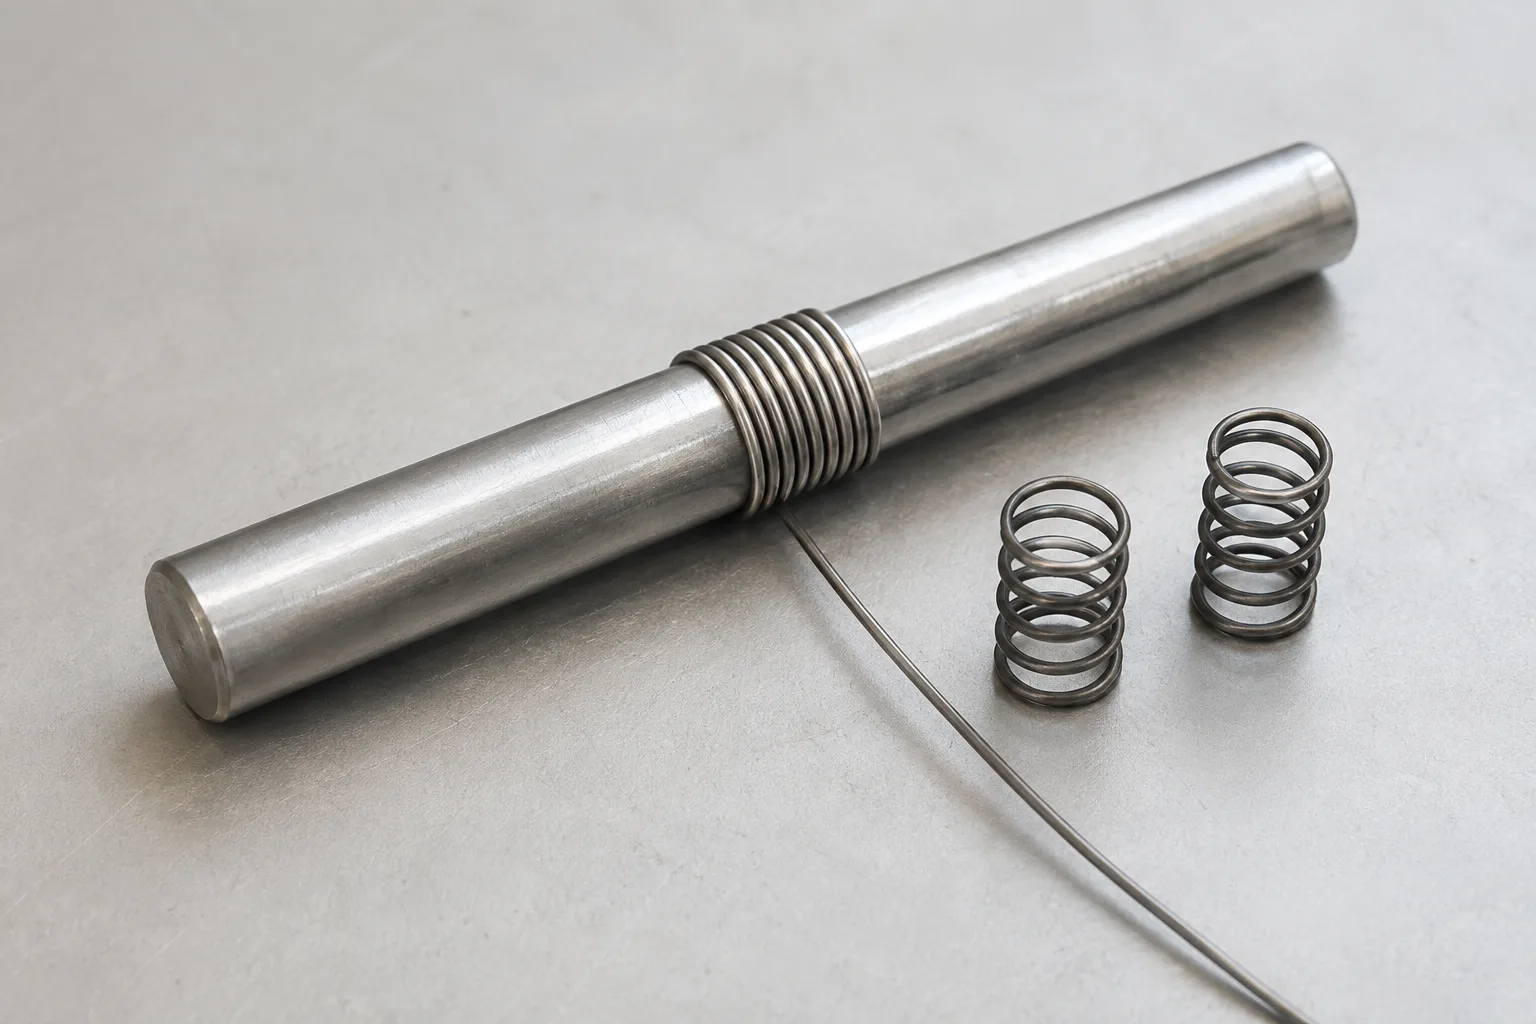
Need a spring in a size you cannot find? You can make a small coil spring by winding spring wire around a steel rod. A simple hand tool may be enough for one spring. A winding jig or machine gives you more control when you need several or need uniform spacing between coils.
This guide covers the practical details that often get skipped: where to buy suitable wire, whether to start with straight or coiled stock, ways to hold the mandrel, ways to anchor the starting end, how to guide the wire, and how to release the finished coil safely.
Start with the Spring You Need
First decide whether you are making a compression, extension, or torsion spring. The same basic winding action can form all three, but the coil spacing and ends are different.
- Compression springs have space between at least some active coils so the spring can shorten under load.
- Extension springs normally have coils wound together and need hooks, loops, or other ends. Consistent initial tension is harder to achieve than simply winding a close coil.
- Torsion springs work by twisting and need legs positioned to suit the assembly.
For a replacement, measure the original spring's wire diameter, outside diameter, inside diameter, body length, and number of turns. Record the wind direction and the shape and position of both ends. A damaged or fatigued spring is only a starting point because its present length and spacing may differ from the original.
For a new design, consider both the available space and the required force and travel. Thicker wire generally makes a compression spring stiffer. A larger coil diameter or more active turns generally makes it softer, with other factors unchanged. The Krexil Spring Calculator helps estimate spring rate and compare dimensions before you cut wire.
Choose Actual Spring Wire
Start with wire identified by its material, temper, diameter, and specification. Ordinary hardware-store utility wire, welding wire, electrical wire, and soft stainless safety wire may wind neatly but are not automatic substitutes for spring-temper wire. They may take a permanent set instead of returning to shape.
| Wire | Why it is used | Points to consider |
|---|---|---|
| Music wire | A common high-carbon spring wire for small springs and prototypes | Strong and widely available, but normally needs protection from moisture and corrosive environments |
| Stainless spring wire | Useful where corrosion resistance matters | Confirm the alloy and spring temper. Generic soft stainless wire is not the same product |
| Oil-tempered spring wire | Available for many mechanical spring applications, often in larger sizes | Material choice and forming limits depend on the spring and process |
For a few prototypes, look for music wire or spring wire at industrial supply houses, model-aircraft and hobby suppliers, and some well-stocked hardware stores. Straight music-wire lengths are especially common in hobby channels. For more sizes, longer runs, stainless grades, or traceable material, use a spring-wire distributor or wire processor. Examples include McMaster-Carr's music and spring wire listings and Gibbs Interwire's wire products. A distributor may offer coils, spools, reels, and cut-to-length material.
Do not order by gauge alone. Gauge systems differ, and a small diameter error can substantially change the spring rate. Order and verify the actual decimal-inch or millimeter diameter with a micrometer.
Straight Lengths or Coiled Stock?
Straight lengths are convenient for one-off work. They are easy to measure, keep under control, and feed into a simple hand jig. Their length limits the number of turns you can make, and the unusable portion at each end can make them wasteful for repeated production.
Coiled, spooled, or reeled stock is better for longer springs and repeated work. It needs a controlled payoff that lets the wire leave its package without the coil jumping loose, tangling, or pulling sideways against the guide. Keep the supplied coil or reel contained, follow the supplier's unwinding instructions, and never open a bound coil casually. Stored wire can release with considerable energy.
Coiled stock also carries cast, the natural curve left by its package. A good guide and steady back tension help it feed consistently. Production equipment may add straightening rollers, but for a short hand-wound spring it is often enough to keep the feed path smooth and repeatable. Do not repeatedly bend hardened wire back and forth to make it look straight; that can damage the surface and use up fatigue life.
Select the Mandrel
The rod you wind around is called a mandrel. Use a smooth, stiff steel rod with enough length for the spring body, the starting anchor, and a safe way to support or turn it. A polished drill rod, dowel pin, or smooth steel shaft is usually easier to remove than rough threaded rod. Avoid sharp scratches, burrs, and abrupt grooves that can mark the wire.
The mandrel diameter is usually smaller than the finished spring's inside diameter because the wire opens after it is released. This springback depends on material, wire diameter, coil diameter, and winding tension, so a formula is rarely a substitute for a trial. Wind a short sample, release it carefully, measure the relaxed inside and outside diameters, and adjust the mandrel before making the full spring.
Ways to Hold the Mandrel Securely
The mandrel must resist the winding torque without slipping, bending excessively, or pulling out of its support. Which arrangement makes sense depends on wire size and whether the mandrel turns or stays fixed.
- Bench vise and hand lever: Clamp one end of a stationary mandrel in a solid bench vise, preferably on flats or a square section so it cannot rotate. Wind the wire around the exposed end with a separate hand lever or guiding tool. This is simple for thin wire and short springs.
- Vise-mounted crank: Support a rotating mandrel in a purpose-built winding head clamped to the bench or vise. A crank, wrenching flats, or cross handle turns the shaft. A bushing or bearing at the outboard end keeps a longer mandrel from whipping.
- Two-bearing hand jig: Carry the mandrel in aligned pillow blocks or bushings on a rigid base, with a crank on one end. This is easier to turn smoothly and is a good basis for a removable wire guide, turn counter, or pitch stop.
- Lathe collet or chuck: A collet provides even grip on a matching round mandrel; a correctly tightened chuck can hold a larger range of sizes. Support a long, slender mandrel at the tailstock end where appropriate. Lathe winding requires an experienced operator, a designed guide, low speed, and guarding.
A handheld drill is a poor winding fixture. It gives little support to the far end, puts the trigger and rotating work in the operator's hands, and encourages the other hand to become the wire guide. If powered rotation is justified, use a rigid, guarded setup with a positive stop and a guide that keeps hands out of the rotating area.
Ways to Lock the Starting End
The wire end often called the stationary end is stationary relative to the mandrel. On a rotating jig it turns with the mandrel. The anchor only has to prevent that tag end from sliding while the first full turn develops grip. Plan the anchor so it can be released without fighting a loaded spring.
- Cross-hole: Drill a smooth hole through the mandrel, insert a short wire tail, and wind away from it. This is compact and positive. The hole must suit the wire without a sharp edge, and drilling weakens a small mandrel.
- Radial hole with a retaining collar: Put the wire in a shallow radial hole or slot and capture it with a shaft collar. The collar can also locate the first coil. Keep set screws away from the active spring surface.
- Split clamp or clamping block: Trap a sacrificial wire tail between two smooth clamp faces attached to the winding head. This avoids drilling the mandrel and releases easily after the coil is restrained.
- Removable pin or screw: Place a pin beside the mandrel and bend the starting tail around it. The pin must be strong, closely fitted, and positioned so it cannot pull out or trap the completed spring.
Do not rely on hand pressure, adhesive tape, or pliers held next to a powered mandrel. Do not clamp across the active coils. Whatever anchor you use, leave enough sacrificial tail to grip and form the end after winding.
Guide the Wire and Control the Pitch
A useful winding setup has three controlled elements: the mandrel, the starting anchor, and the incoming-wire guide. The guide should be close to the point where the wire meets the mandrel. The farther away it is, the easier it is for the wire to wander or climb over a previous turn.
For thin wire at hand speed, the guide may be a smooth hardwood block, a grooved metal block with rounded edges, or a purpose-built lever with a hardened eye or roller. The guide supplies steady back tension and directs the next turn. It should not nick, flatten, or scrape the wire. Pliers can damage the surface and make tension erratic.
For a close-wound coil, guide each new turn firmly against the preceding turn. For a compression spring, establish spacing by moving the guide a controlled distance per revolution. A lead screw, marked carriage, spacer, or pitch template is more repeatable than judging the gap by eye. Winding a close coil and pulling it longer afterward can work for a rough prototype, but it usually gives less control over pitch and end position.
Core Winding Procedure
- Make a drawing or setup note. Record wire diameter, target inside and outside diameters, body length, active turns, total turns, pitch, wind direction, and end shape. Mark which way the crank must turn.
- Estimate the wire length. One body turn uses roughly the circumference at the wire centerline. Add material for inactive end turns, hooks or legs, the anchor tail, cutting, and at least one trial piece.
- Prepare the tooling. Clean and deburr the mandrel, anchor, and guide. Confirm that the mandrel support, bench, and vise or jig fasteners cannot move under load.
- Control the supply. Lay out a straight length so it cannot snag, or place coiled stock on its proper contained payoff. Keep bystanders away from the wire path.
- Install the starting tail. Put the tail in the cross-hole, collar, clamp, or pin arrangement. Pull gently to confirm it is captured before applying winding force.
- Set the guide. Bring it close to the mandrel and align the wire with the first coil position. Apply only enough back tension to make the wire conform consistently.
- Form the first turn slowly. Watch the anchor and guide. If the wire slips, crosses over itself, or develops a sharp kink, stop and correct the setup rather than forcing the next turn.
- Wind the body. Turn the mandrel slowly and steadily while moving the guide for the required pitch. Count revolutions and remember that end coils may be inactive. Do not measure or adjust a powered setup while it is moving.
- Stop with the end where you need it. For torsion-spring legs or other oriented ends, the final fraction of a turn matters. Record the stop position if you need matching parts.
- Restrain before releasing. Stop all motion. Keep the coil controlled with the designed guide or a safe restraint, then release winding tension gradually. Assume the starting and free ends can move suddenly.
- Cut and remove the spring. Use cutters rated for hardened wire. Shield the cutoff and keep it from flying. Release the starting anchor, then slide the spring from the mandrel without prying between active coils. A slight taper, removable mandrel, or collapsible production mandrel may be needed for difficult parts.
- Measure the relaxed part. Check wire diameter, coil diameters, free length, turn count, pitch, and end orientation. Use the result to correct the mandrel or guide setting for the next attempt.
Finish the Ends and Test the Spring
Compression-spring ends may be left open, closed by reducing the pitch at the end, or closed and ground so the spring sits flatter. Extension springs may use machine hooks, side hooks, loops, or separate attachments. Torsion-spring legs may need a controlled bend after the body is wound. End forming introduces concentrated stress, so avoid sharp tool marks and repeated rebending.
Stress relief and other heat treatment are material-specific. Do not copy a temperature from an unrelated video or apply a torch by eye. Follow the wire supplier's guidance for the exact alloy, temper, diameter, and application. Some processes also change dimensions, surface condition, or corrosion resistance.
Finally, test the spring in increments. Confirm that it fits, moves freely, and returns to its intended length before applying the full working load. Do not compress a spring to solid height or extend it beyond its intended travel unless the design permits it. Leave springs used in brakes, lifting equipment, pressure systems, guards, medical devices, or other safety-critical assemblies to a qualified spring designer and manufacturer.
Safety During Spring Winding
Wear safety glasses, and use a face shield where the stored energy and cutoff risk justify one. Wire can whip when released, clipped ends can fly, and coiled stock can expand suddenly. Keep your face and body out of the wire's likely path. Use cutters rated for the wire's hardness and diameter.
With powered equipment, use appropriate guards, keep fingers away from the rotating mandrel, remove jewelry, secure long hair, and avoid loose clothing and gloves that could catch. Stop and isolate the machine before adjusting, measuring, or clearing the spring. The CCOHS lathe safety guide covers general lathe precautions in more detail.
When a Jig or Machine Makes Sense
Hand winding is reasonable for a trial or occasional thin-wire spring. A hand-cranked jig earns its keep when you want the same anchoring, guide position, direction, and turn count for several parts. A powered or programmable machine becomes useful when controlled pitch and repeatability matter enough to justify purpose-built guarding and setup.
Read Custom Springs: When Making Them In-House Makes Sense for help deciding when to order from a specialist and when a desktop process fits the work.
Krexil will soon release an economical desktop Spring Forming Machine for this work. It lets you set pitch and turn count, with a preliminary capacity of 0.008 to 0.062 inch wire and springs up to four inches long. Wire is clipped manually after forming. Visit the product page for current specifications and release updates.